Overview
This guide shows how to configure Azure Active Directory authentication in mindzie Studio. You only need a few pieces of information from your Azure AD app registration to complete the setup.
Prerequisites
- mindzie Studio Enterprise Server edition
- Azure AD app registration completed (see Azure AD App Registration Guide)
- The following values from your Azure AD app:
- Tenant ID
- Application (Client) ID
- Client Secret
Configuration Steps
Step 1: Open Authentication Configuration
- Launch mindzie Studio
- Navigate to Authentication Configuration
- Select Azure AD / Entra ID from the Authentication Type dropdown
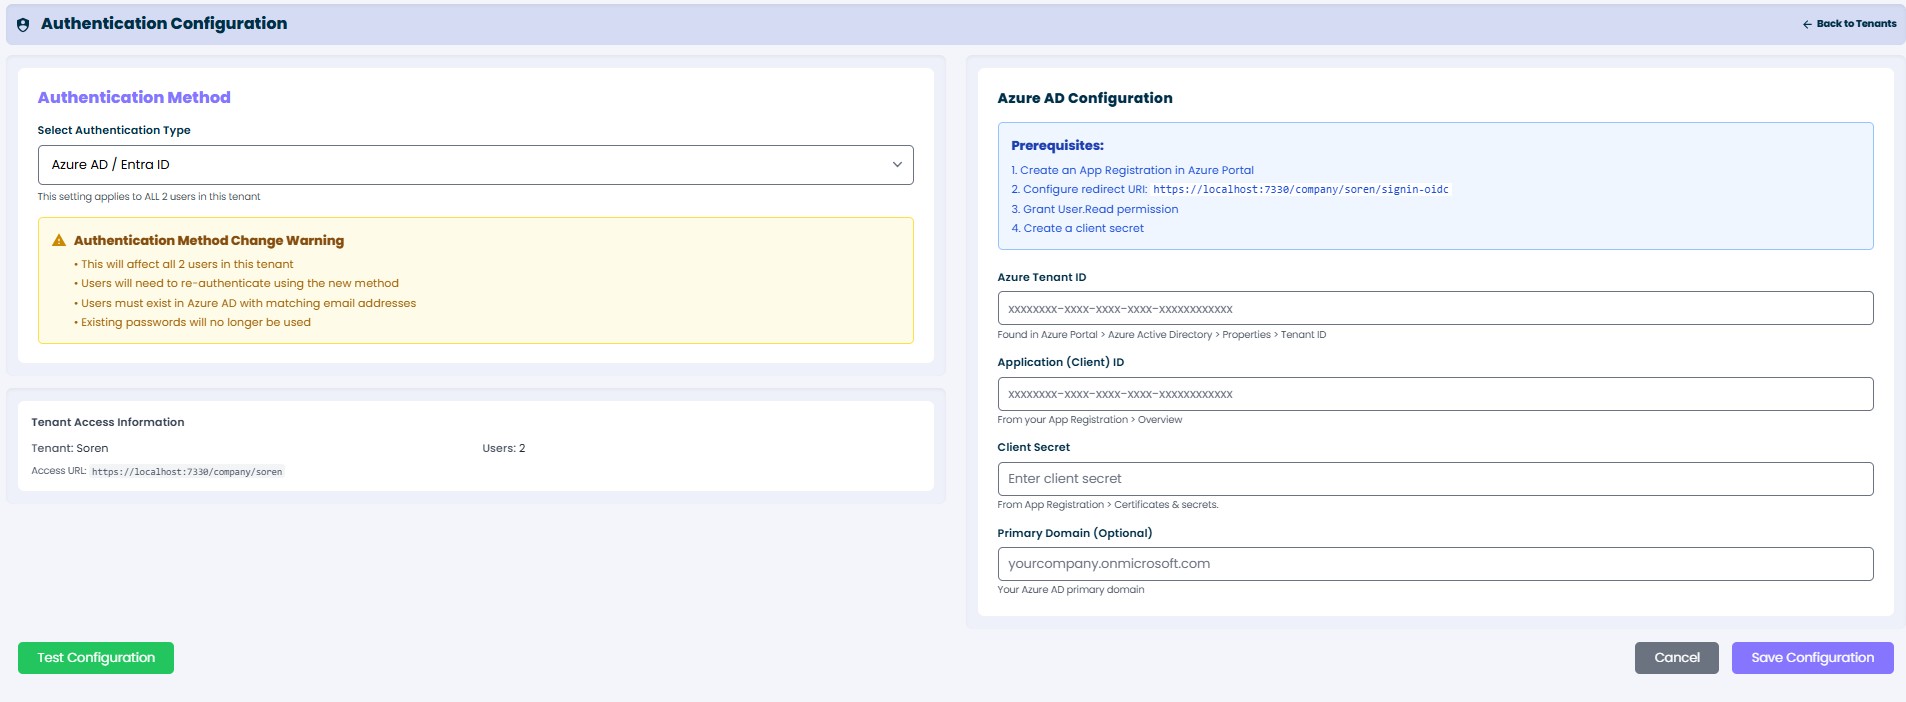 mindzie Studio Authentication Configuration screen
Step 2: Enter Azure AD Details
Fill in the required fields with the values from your Azure AD app registration:
Required Fields:
- Azure Tenant ID: Enter your Azure AD Tenant ID (format: xxxxxxxx-xxxx-xxxx-xxxx-xxxxxxxxxxxx)
- Application (Client) ID: Enter your Application ID from the app registration
- Client Secret: Enter the client secret value you copied when creating it
Optional Field:
- Primary Domain: Your organization's primary domain (e.g., yourcompany.onmicrosoft.com)
Step 3: Test and Save
- Click Test Configuration to verify the connection to Azure AD
- If the test succeeds, click Save Configuration
- The system will apply the new authentication settings
What Happens Next
After saving the configuration:
- Users can log in using their Azure AD credentials
- The system will validate users against your Azure AD tenant
- User access will be controlled based on Azure AD group memberships
- Existing passwords will no longer be used for authentication
Troubleshooting
Common Issues
Test Configuration Failed
- Verify the Tenant ID is correct
- Check that the Application ID matches your app registration
- Ensure the Client Secret hasn't expired
- Confirm your app registration has the correct redirect URIs configured
Users Can't Log In
- Verify users exist in your Azure AD tenant
- Check that users have been granted access to the application in Azure AD
- Ensure the Azure AD app registration is not disabled
Important Notes
- The Client Secret must be the actual value, not the Secret ID
- All three required fields must be filled for the configuration to work
- The system will automatically handle the OAuth flow with Azure AD
- No additional network or firewall configuration is typically required for cloud-hosted Azure AD
Next Steps
Once configuration is complete:
- Test login with a regular user account
- Verify admin users have appropriate access
- Document the configuration for your IT team
- Set a reminder to rotate the client secret before it expires