Overview
This guide provides step-by-step instructions for registering a mindzie Studio application in Azure Active Directory (Azure AD) to enable secure authentication and Single Sign-On (SSO) capabilities. By following this process, you'll create an Azure AD application that allows users to authenticate using their Microsoft organizational accounts.
Prerequisites
Before beginning the app registration process, ensure you have:
- Azure Portal Access: Administrative access to your organization's Azure Portal
- Azure AD Tenant: An active Azure AD tenant (single-tenant or multi-tenant)
- Permissions: Application registration permissions in Azure AD
- mindzie Studio Region: Knowledge of your mindzie Studio deployment region (e.g., www, Europe, Australia, KSA)
Step-by-Step Registration Process
Step 1: Access Azure Portal App Registrations
Navigate to Azure Portal
- Open your web browser and go to https://portal.azure.com
- Sign in with your administrative credentials
Access App Registrations
- In the Azure Portal, search for "App registrations" in the top search bar
- Select App registrations from the search results
- Alternatively, navigate through: Azure Active Directory → App registrations
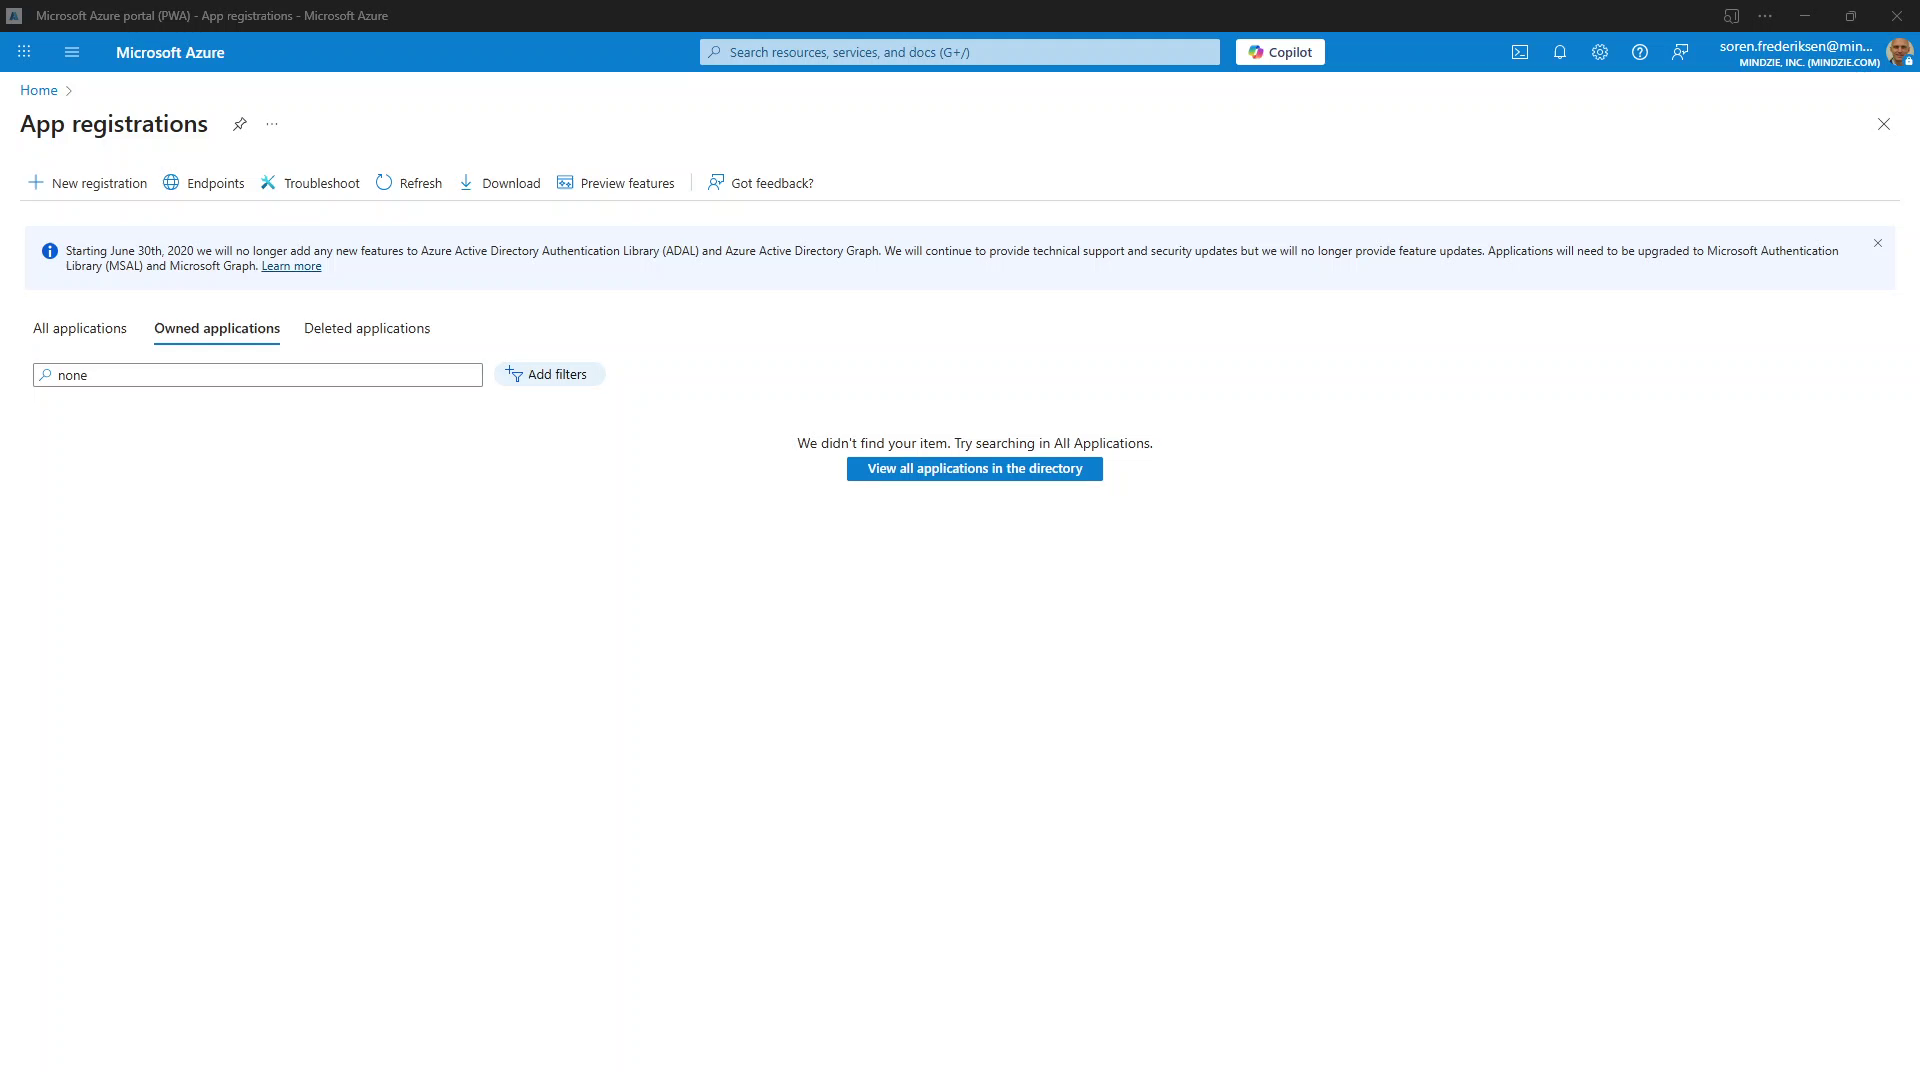 Azure Portal - App Registrations page
Step 2: Create New App Registration
- Initiate New Registration
- Click the New registration button at the top of the App registrations page
 Creating a new app registration
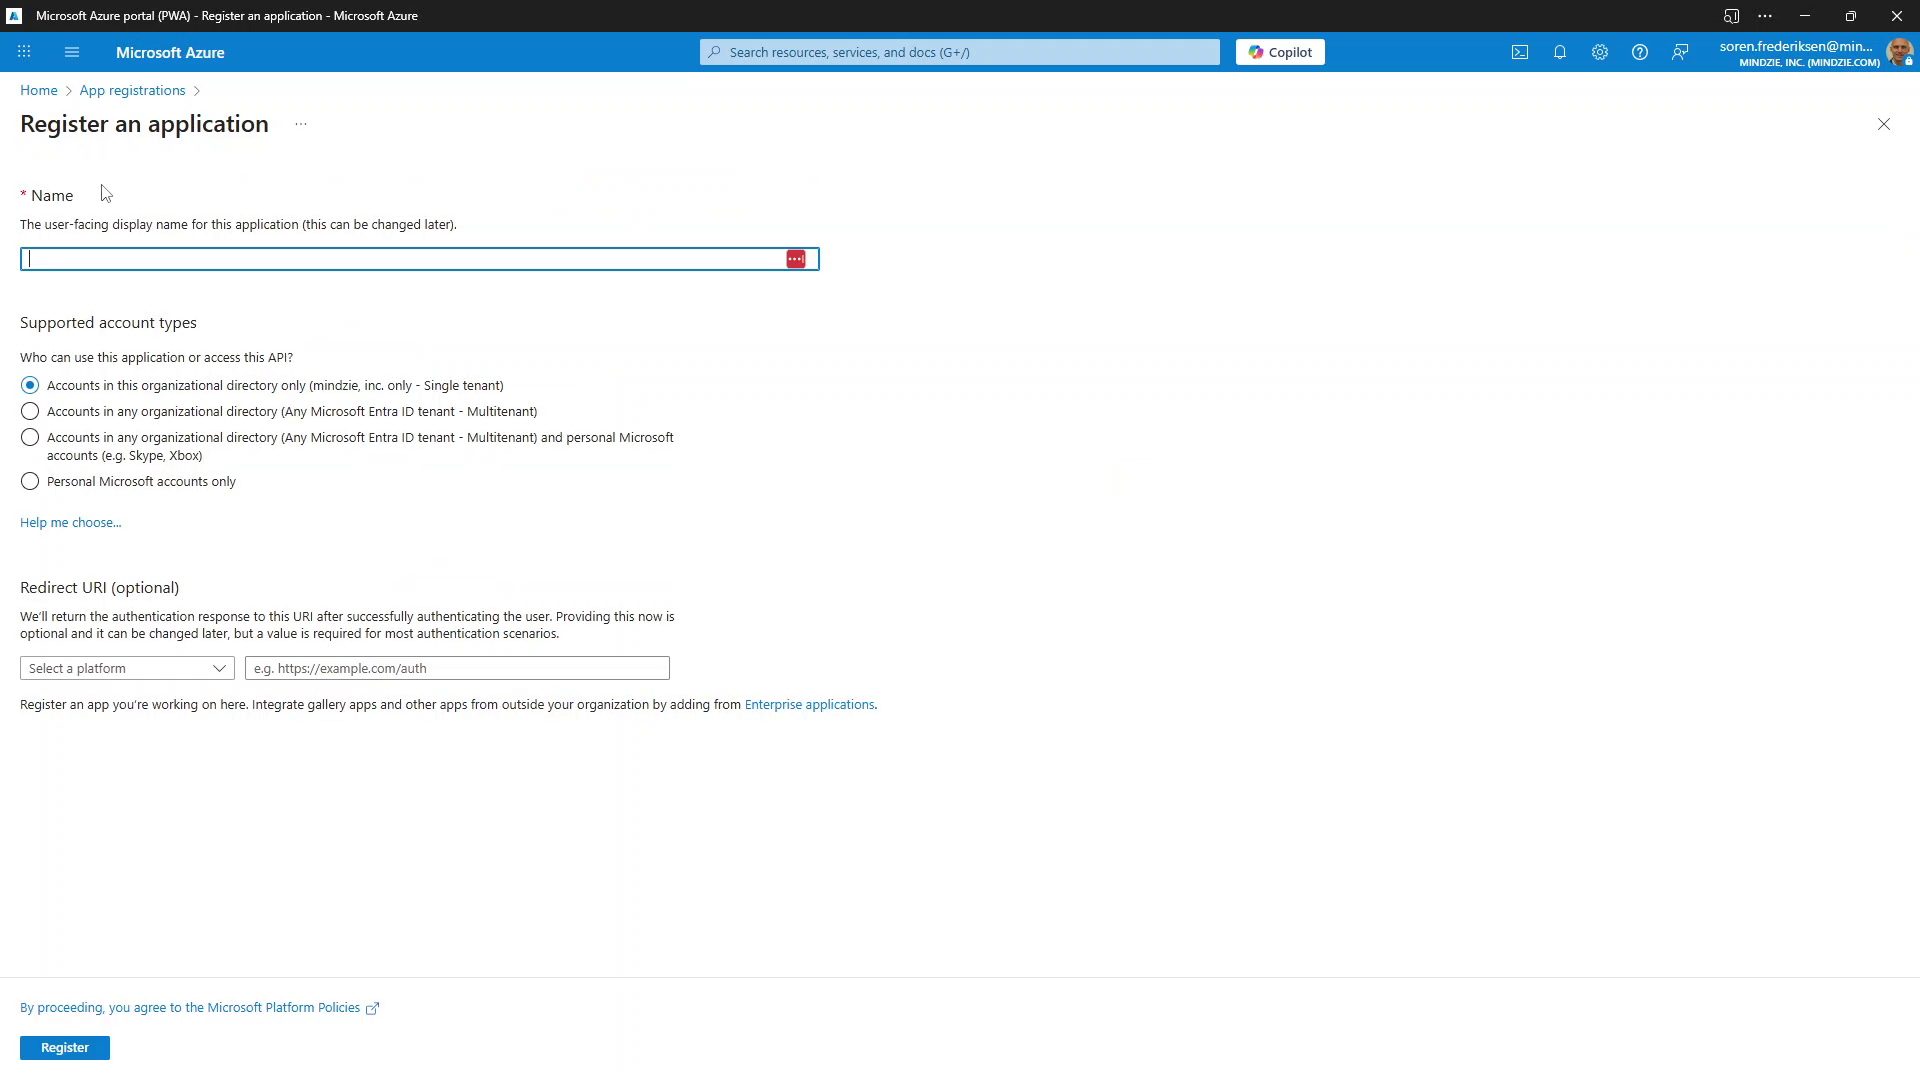
Configure Basic Settings
Name:
- Enter a descriptive name for your application
- Recommended:
mindzie AD Integrationormindzie Studio SSO - This name will be visible to users during authentication
Supported Account Types:
- Select Accounts in this organizational directory only (Single tenant)
- Note: Currently, mindzie Studio only supports single-tenant integration
- Multi-tenant support may be available in future releases
Redirect URI (Platform Configuration):
- Platform Type: Select Web from the dropdown
- Redirect URI: Enter your mindzie Studio region-specific URL:
https://[region].mindziestudio.com/company/[tenant_name]/signin-oidc - Replace
[region]with your deployment region:www- Global/US regioneurope- European regionaustralia- Australia/Pacific regionksa- Kingdom of Saudi Arabia region- Other regions as applicable
- Replace [tenant_name] with the tenant you are logging into
 Register an application form - Fill in the Name, select Single tenant, and configure the Redirect URI
- Complete Registration
- Review your settings
- Click Register to create the application
- Azure will create the app and redirect you to the app overview page
Step 3: Configure Authentication Settings
After registration, you need to configure additional authentication settings:
Access Authentication Settings
- From your app's overview page, select Authentication from the left navigation menu
Configure Redirect URIs
The initial redirect URI was added during registration. Now add the sign-out URI:
Add Sign-out URL:
- In the Web platform section, locate Front-channel logout URL field
- Add your region-specific logout URL:
https://[region].mindziestudio.com/signout-callback-oidc - Replace
[region]with your deployment region (same as used in redirect URI) - Example:
https://www.mindziestudio.com/signout-callback-oidcfor the global region
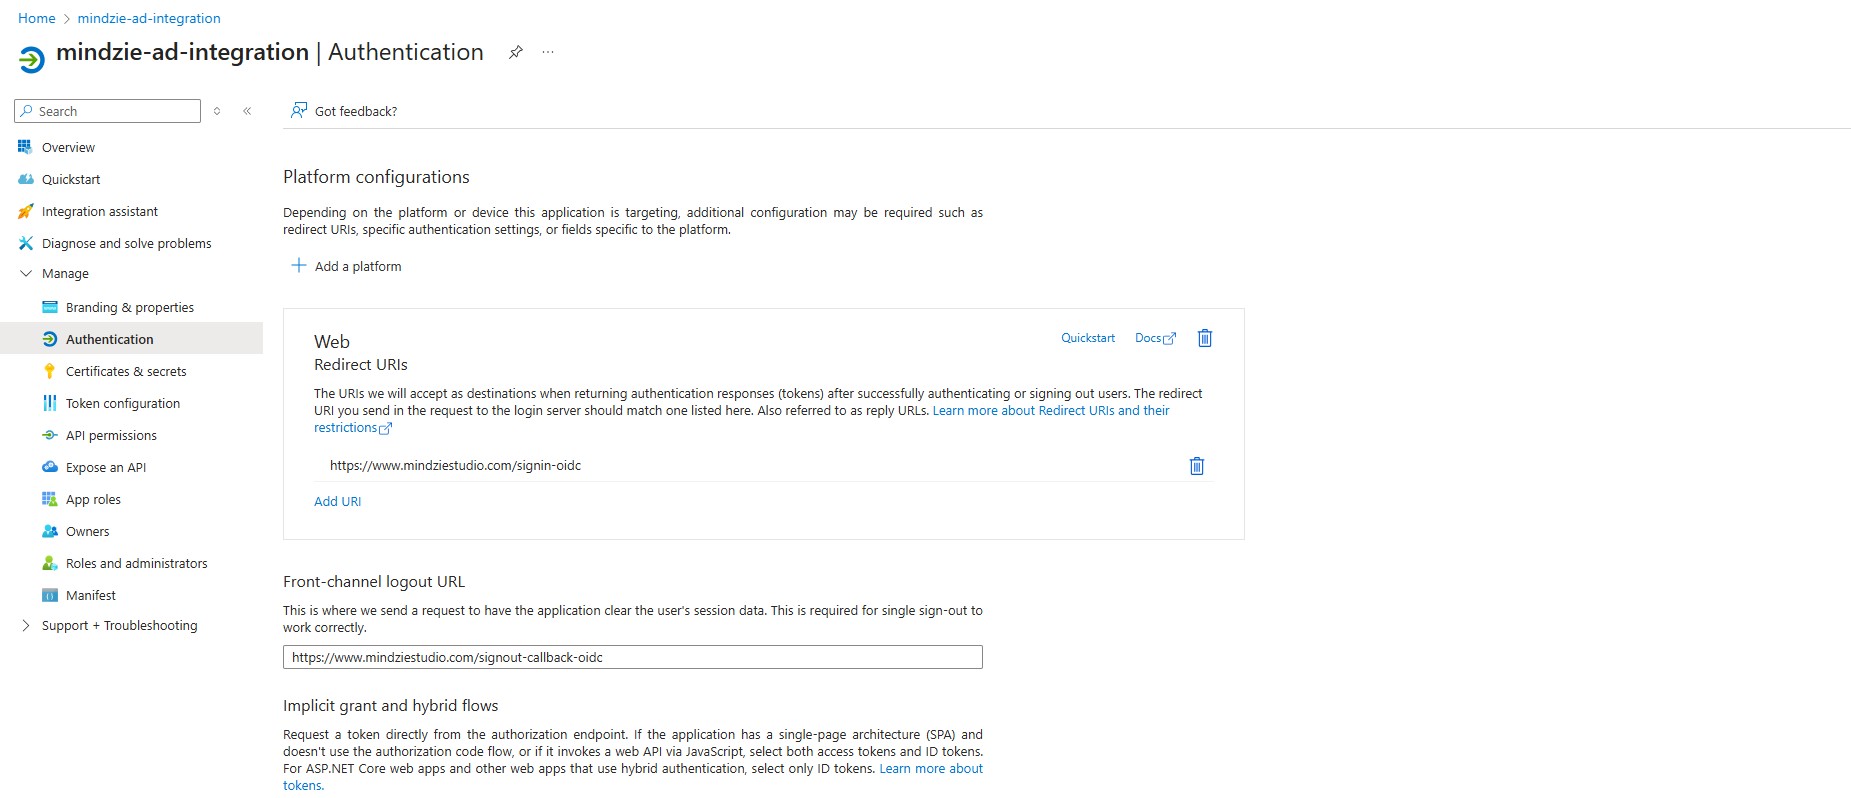 Authentication settings page - Add the logout URL in the Front-channel logout URL field
Additional Settings (Not Required)
- Access tokens: Not needed for mindzie Studio integration
- ID tokens: Already handled by the authentication flow
- Live SDK support: Not required for mindzie Studio
Save Configuration
- Click Save at the top of the authentication settings page
- Verify both redirect and logout URLs are correctly configured
Step 4: Create Client Secret
A client secret is required for mindzie Studio to authenticate with Azure AD:
- Navigate to Certificates & Secrets
- From the left navigation menu, select Certificates & secrets
- Choose the Client secrets tab
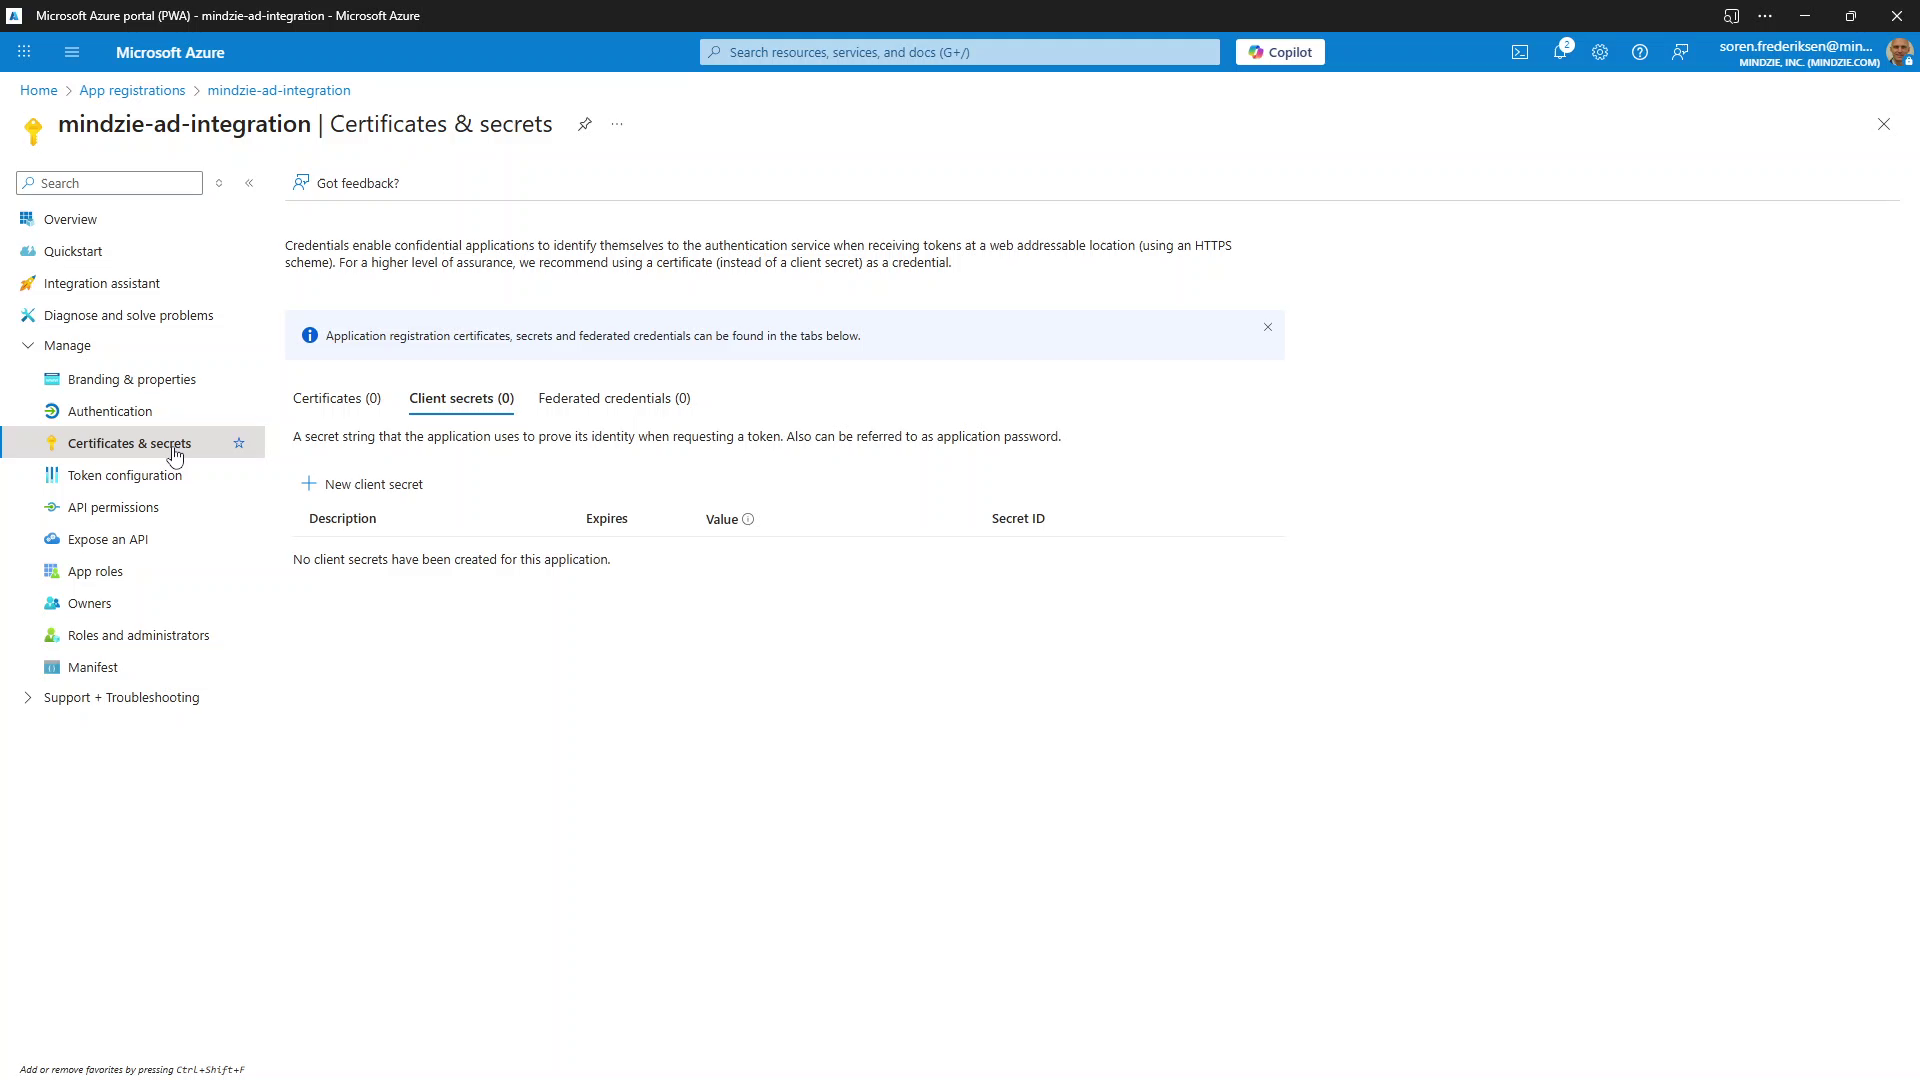 Certificates & Secrets section in Azure Portal
Create New Client Secret
- Click New client secret button
Configure Secret Settings
Description:
- Enter a descriptive name:
mindzie Secretormindzie Studio Authentication - This helps identify the secret's purpose later
Expiration:
- Select an expiration period based on your security requirements:
- 180 days (Recommended) - Good balance of security and maintenance
- 365 days - Less frequent rotation required
- 730 days - Minimum maintenance but less secure
- Custom - Set your own expiration date
Important: Document the expiration date and set calendar reminders to rotate the secret before it expires
- Enter a descriptive name:
Add the Secret
- Click Add to create the secret
- CRITICAL: The secret value will only be displayed once!
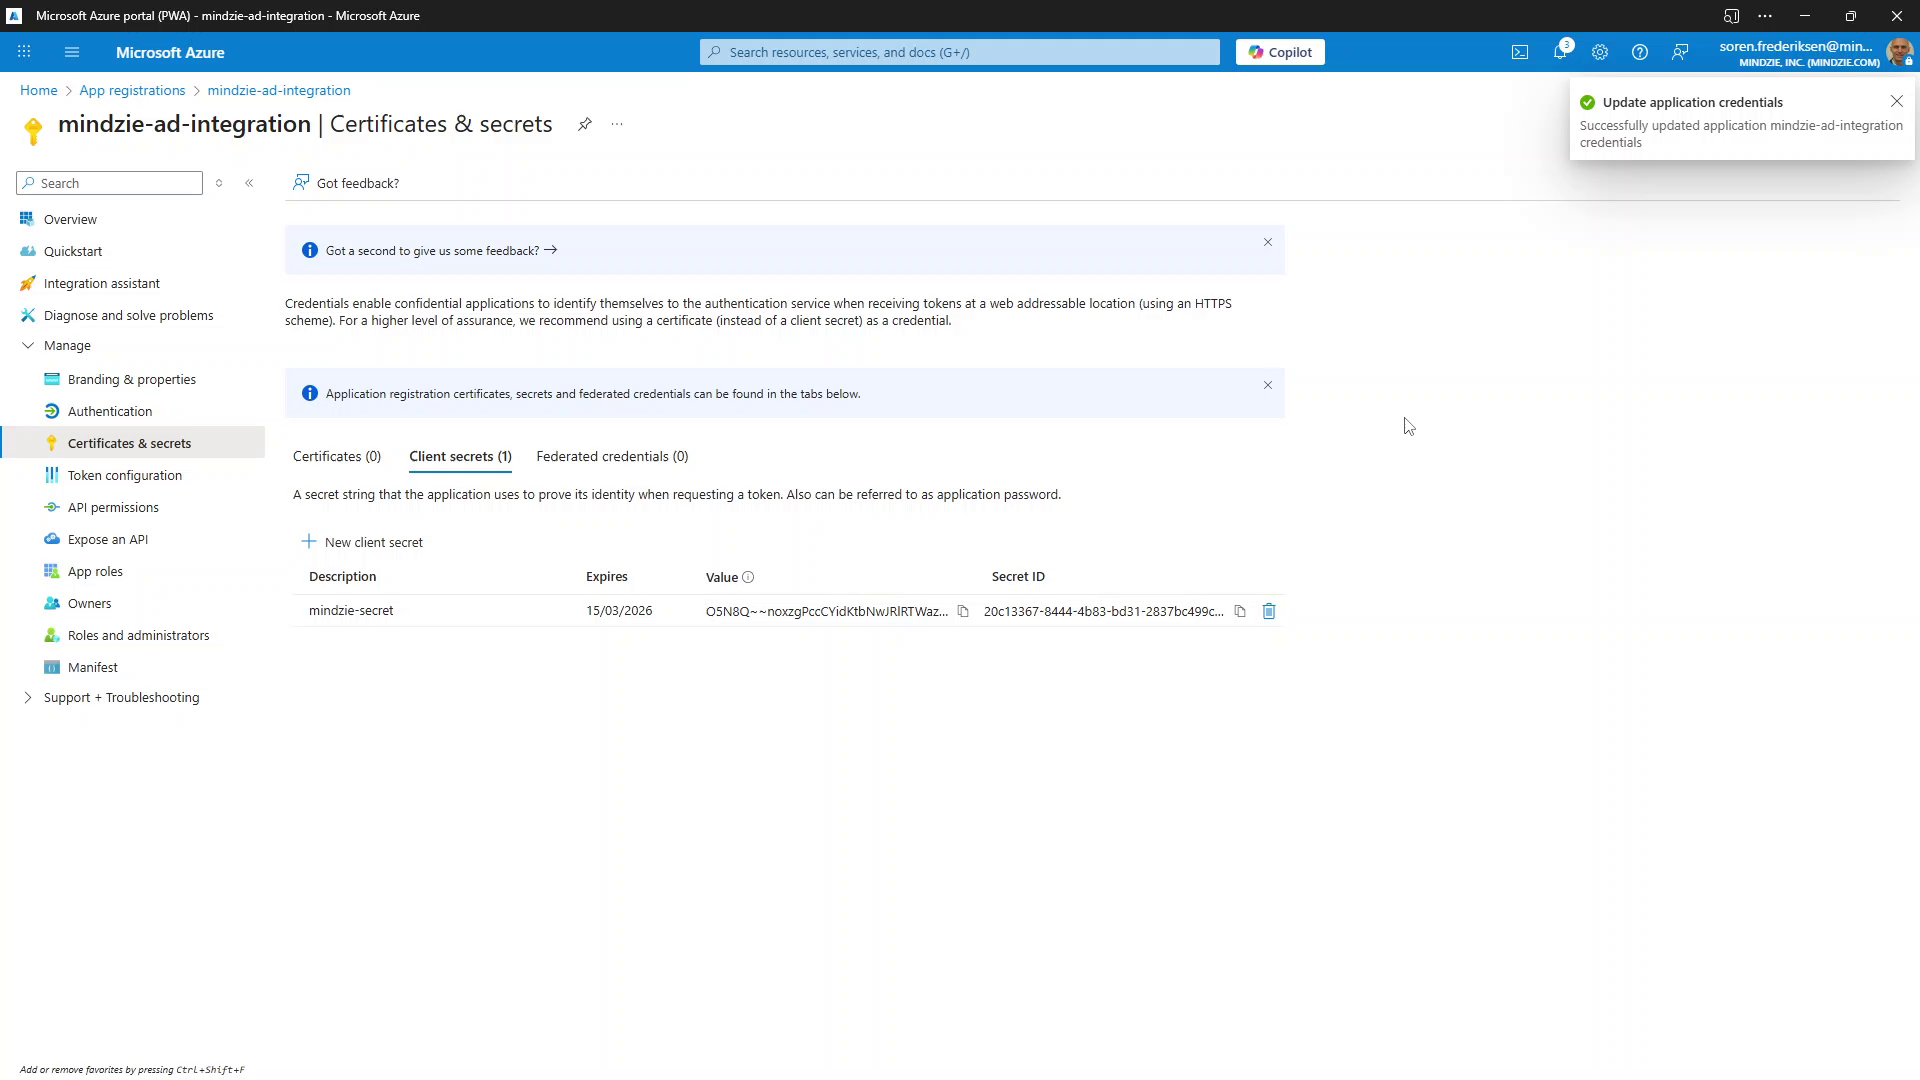 Client secret created - copy the Value immediately
- Copy and Secure the Secret
- Immediately copy the Value (not the Secret ID)
- Store it securely - you'll need this for mindzie Studio configuration
- If you lose this value, you'll need to create a new secret
Step 5: Collect Required Information
Before configuring mindzie Studio, collect the following information from your Azure AD app:
Navigate to Overview Page
- Return to the app's Overview page
Copy Application Details
You need three key values:
Value Location Description Application (client) ID Overview page Unique identifier for your application Directory (tenant) ID Overview page Your Azure AD tenant identifier Client Secret Value Previously copied Authentication secret
 Application overview showing Client ID and Tenant ID
Document the Configuration
You will need these values to configure mindzie Studio. Create a secure record of the following information from Azure AD:
Required Values:
- Azure Tenant ID: Found in Azure Portal > Azure Active Directory > Properties > Tenant ID
- Application (Client) ID: Found in your App Registration > Overview
- Client Secret: The value you copied when creating the secret (not the Secret ID)
Optional Value:
- Primary Domain: Your Azure AD primary domain (e.g., yourcompany.onmicrosoft.com)
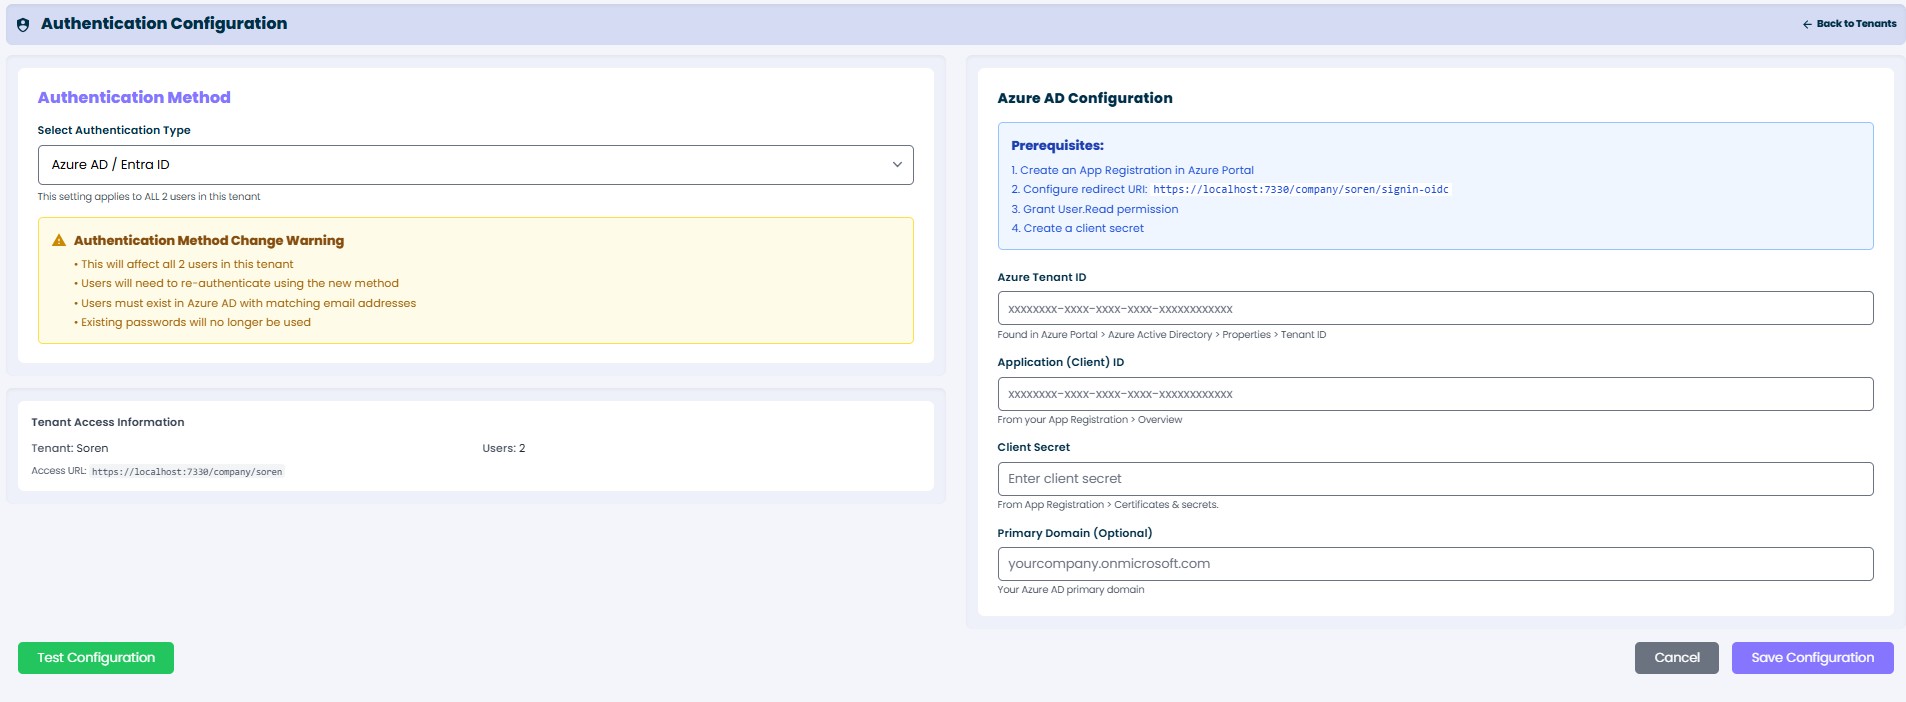 mindzie Studio Authentication Configuration screen showing where to enter the Azure AD values
These values will be entered into mindzie Studio's Authentication Configuration screen as shown above. The configuration screen in mindzie Studio will validate your settings and establish the connection to Azure AD.