Actions
Prefer to watch? This tutorial is also available as a video.
Actions in mindzieStudio allow you to automate tasks based on your process mining data. You can schedule reports to be sent automatically, run data imports, execute Python scripts, and more.
Overview
Actions are automated workflows that run on a schedule or on-demand. Each action consists of four components:
- General - Name and description for the action
- Data - The analysis data the action will use
- Action Steps - What the action will do (send reports, run scripts, etc.)
- Triggers - When the action will run (schedule)
Creating an Action
To create a new action, click Add New Action in the top right corner of the Actions screen.
Step 1: General
The General step is where you define the basic information for your action.
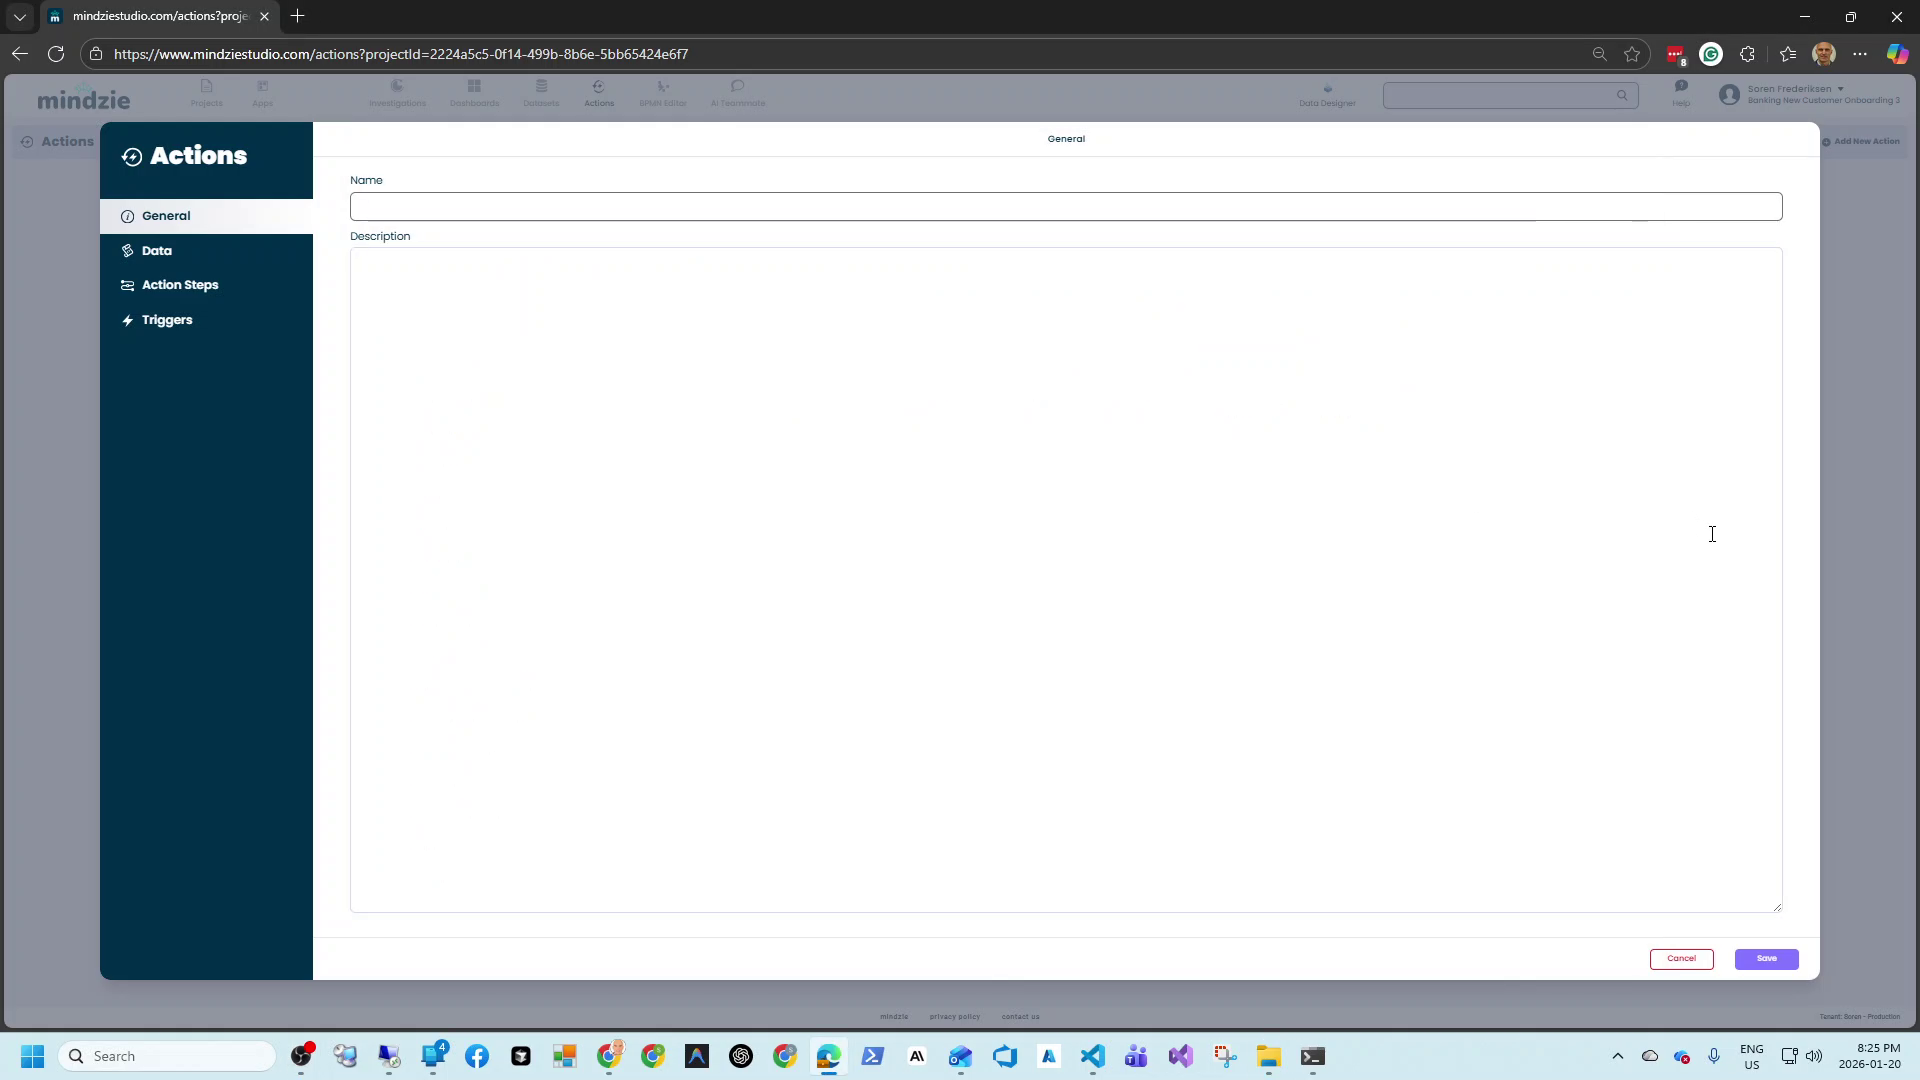
Name (Required): Enter a descriptive name for your action, such as "Executive Weekly Report" or "Daily Data Import".
Description (Optional): Add additional details about what this action does and why it exists.
Step 2: Data
The Data step allows you to select which analysis data the action will use. Click the + button to open the analysis selection dialog.
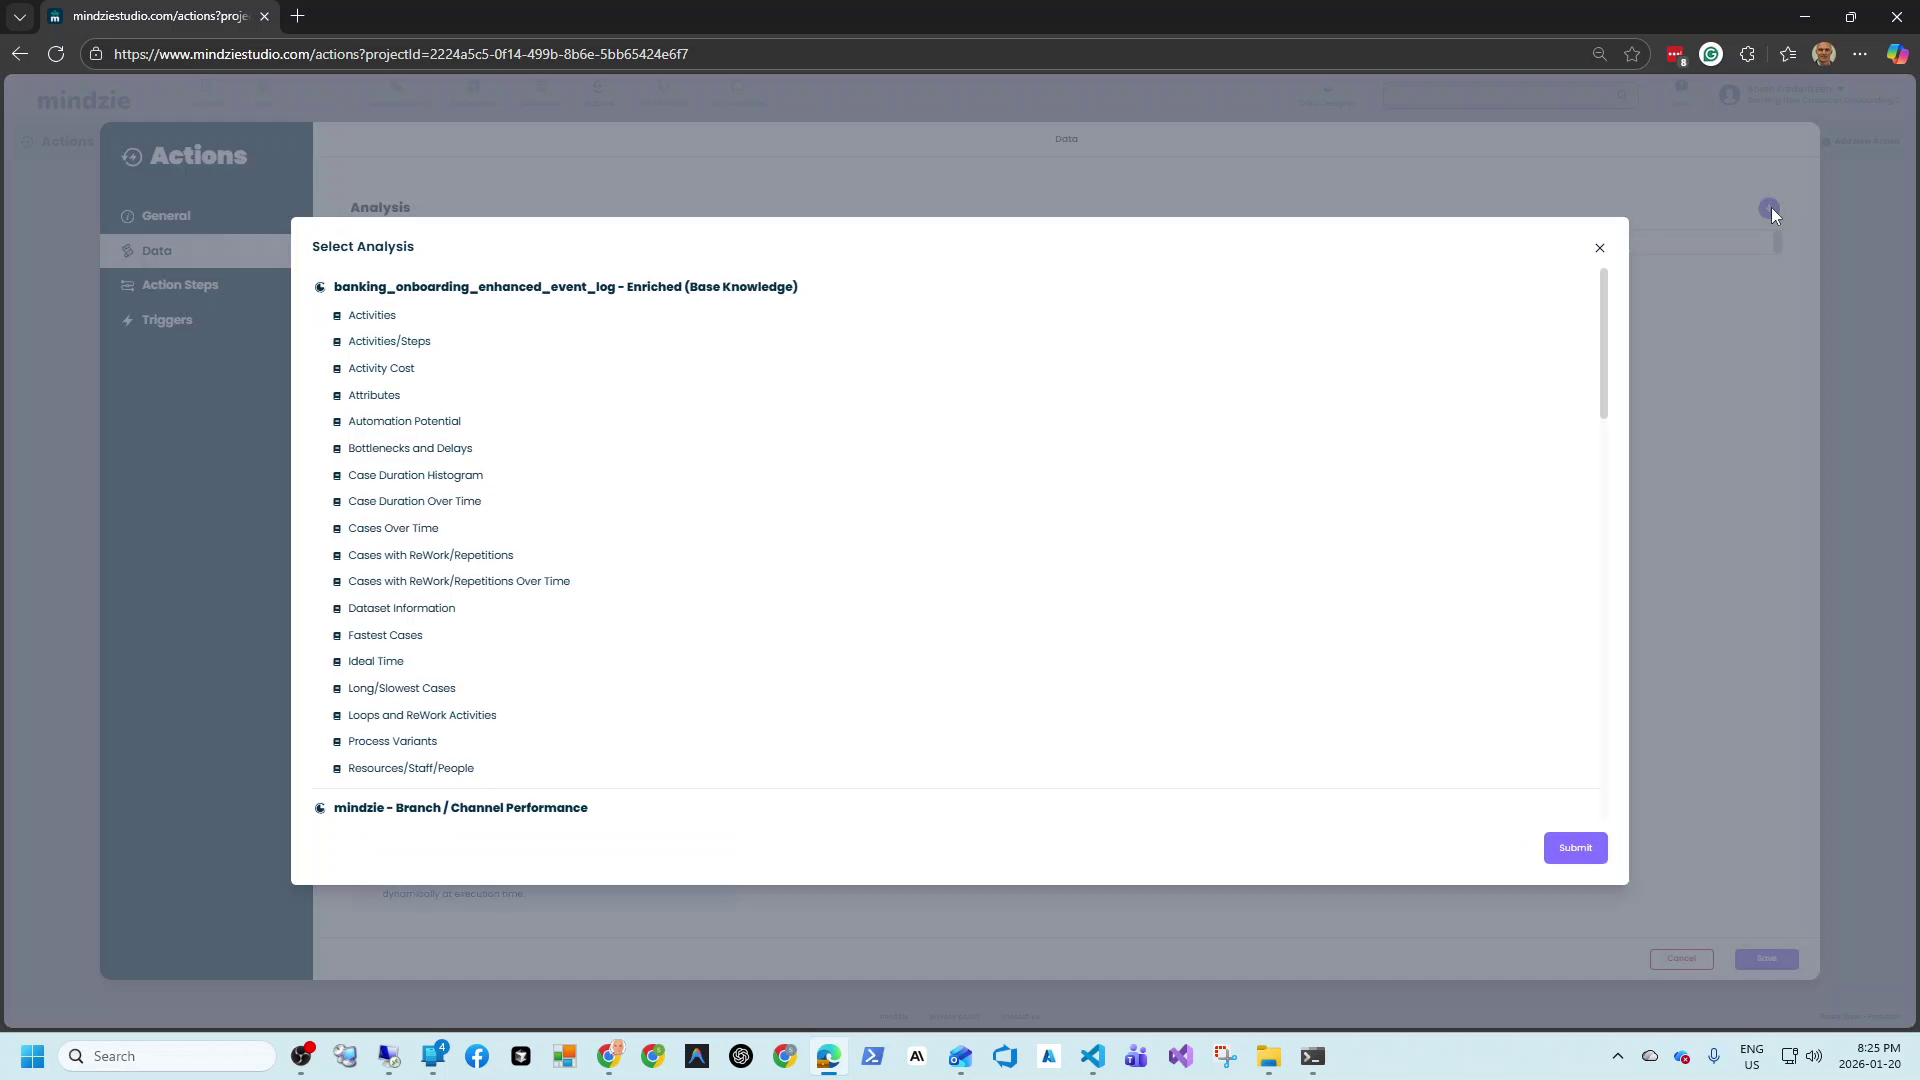
You can select analyses from any investigation in your project. The available analyses include:
- Activities and Activity Steps
- Bottlenecks and Delays
- Case Duration metrics
- Process Variants
- Resources and Staff information
- And many more
After selecting your analyses, they appear in a list showing the Analysis Name, Investigation Name, and who created them.
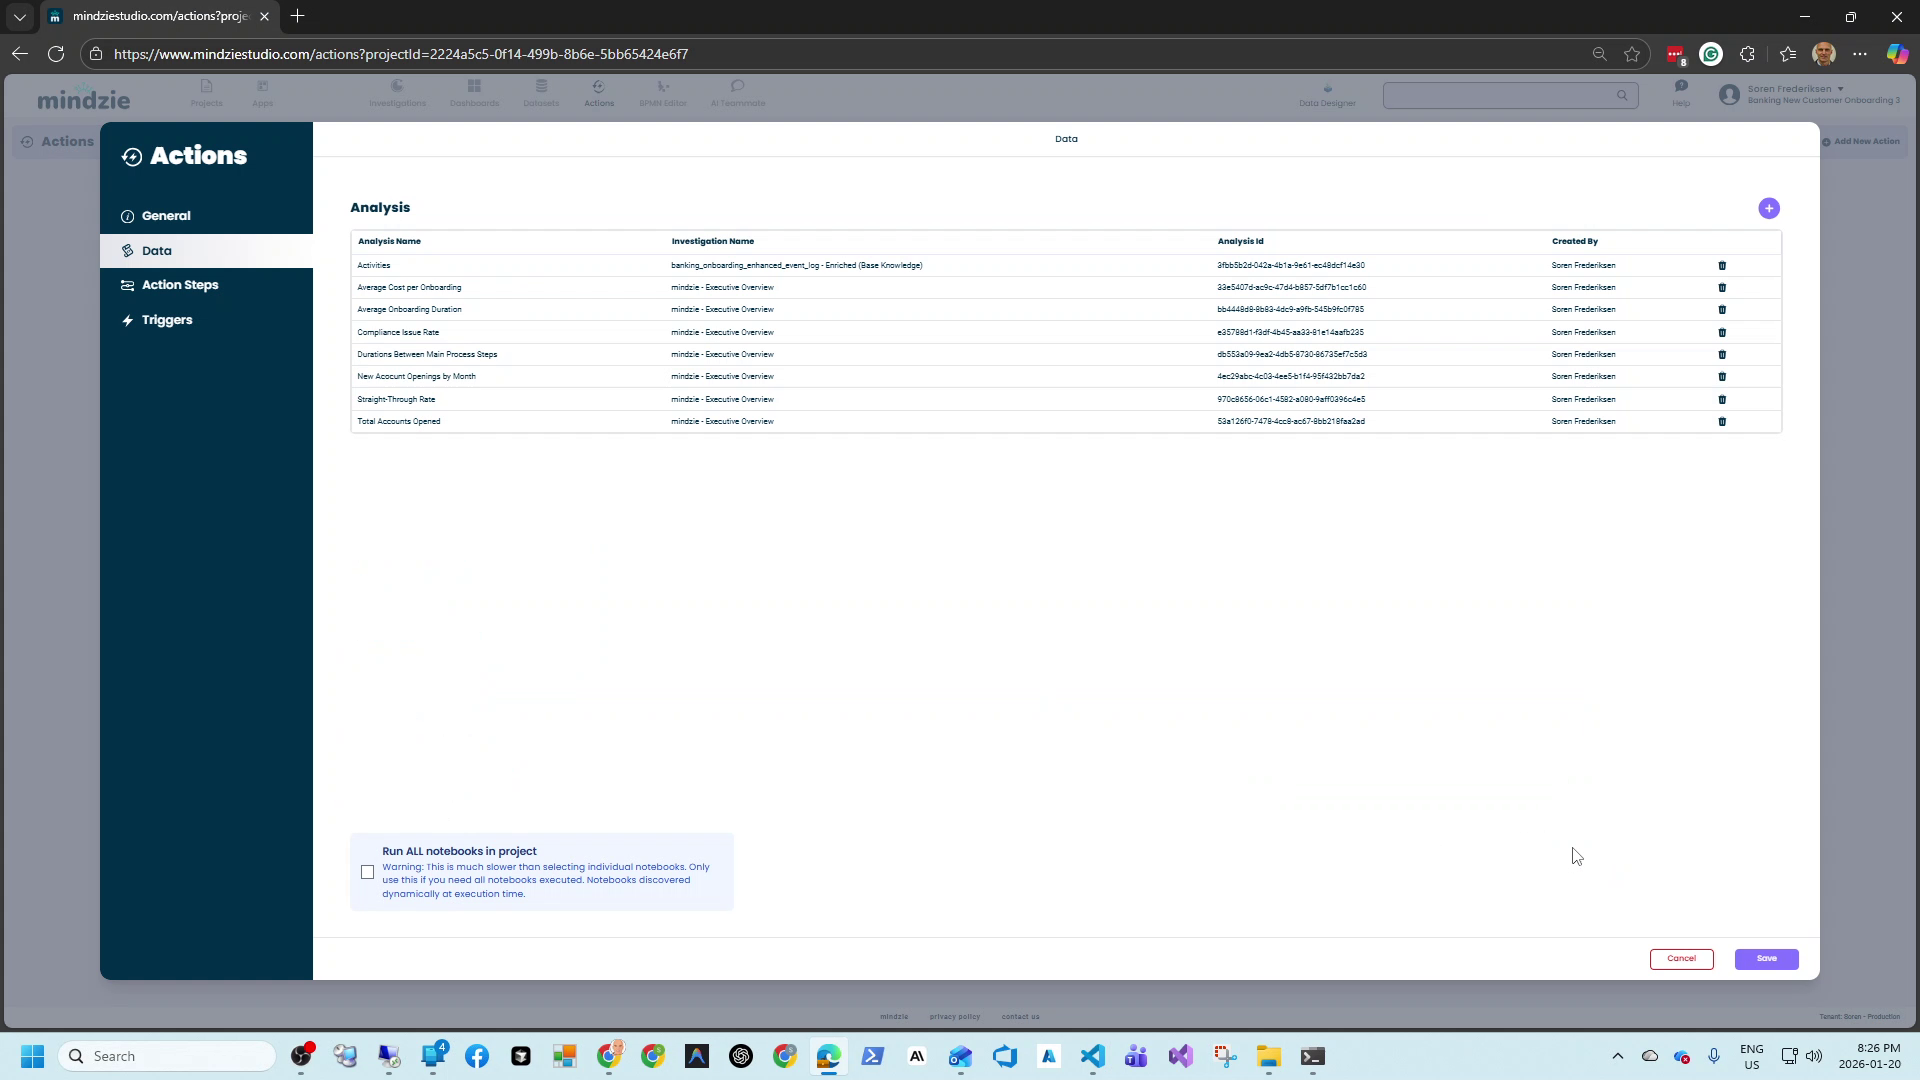
Note: Most action steps require analysis data, but not all. Some action steps like Error & Warning Report work at the project level.
Step 3: Action Steps
Action Steps define what the action will do. Click the + button to add an action step.
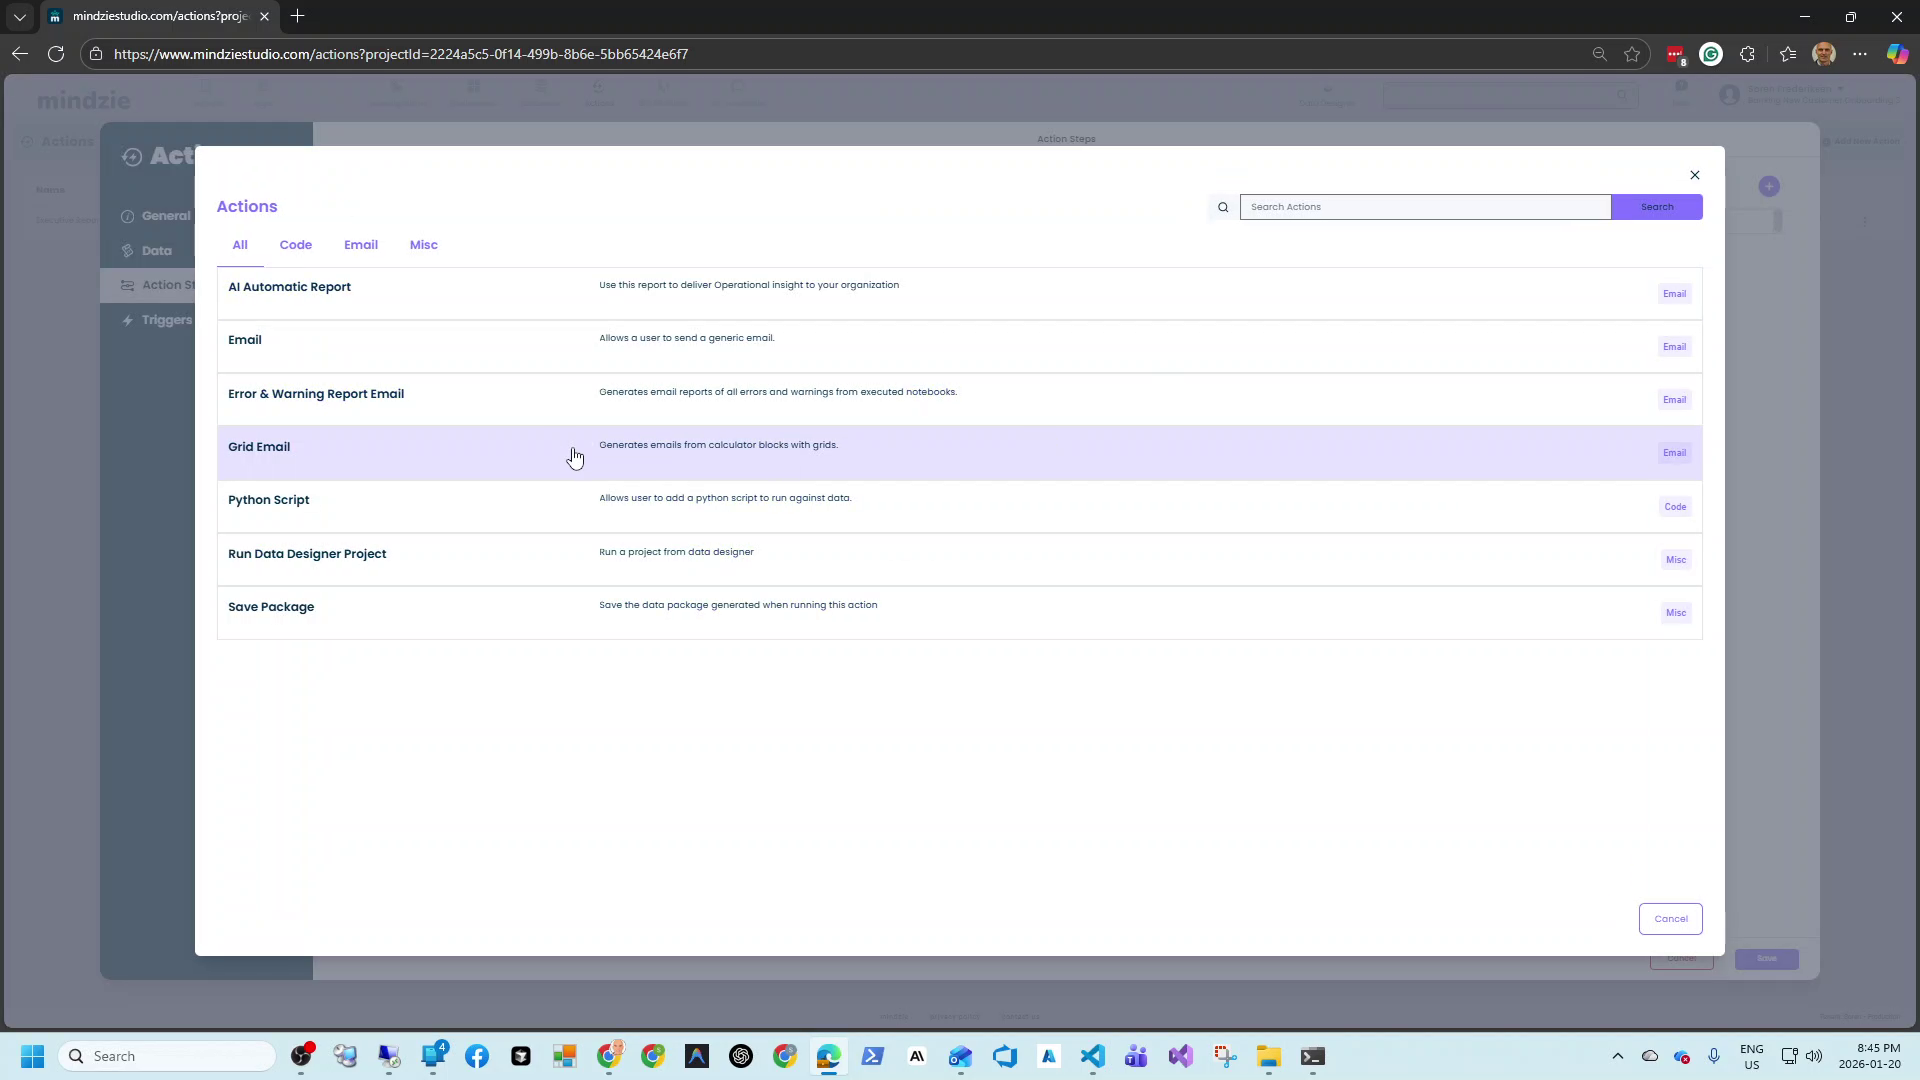
Available action step types:
| Action Step | Description | Category |
|---|---|---|
| AI Automatic Report | Generate AI-powered reports using your analysis data | |
| Error & Warning Report Email | Send reports of errors and warnings from executed notebooks | |
| Grid Email | Send data tables from your analyses via email | |
| Python Script | Execute custom Python code with access to your data | Code |
| Run Data Designer Project | Run a mindzieDataDesigner project to import data | Misc |
Each action step type has its own configuration options. See the individual documentation pages for detailed information:
Step 4: Triggers
Triggers define when the action will run. You can set up scheduled execution using the Daily Scheduler.
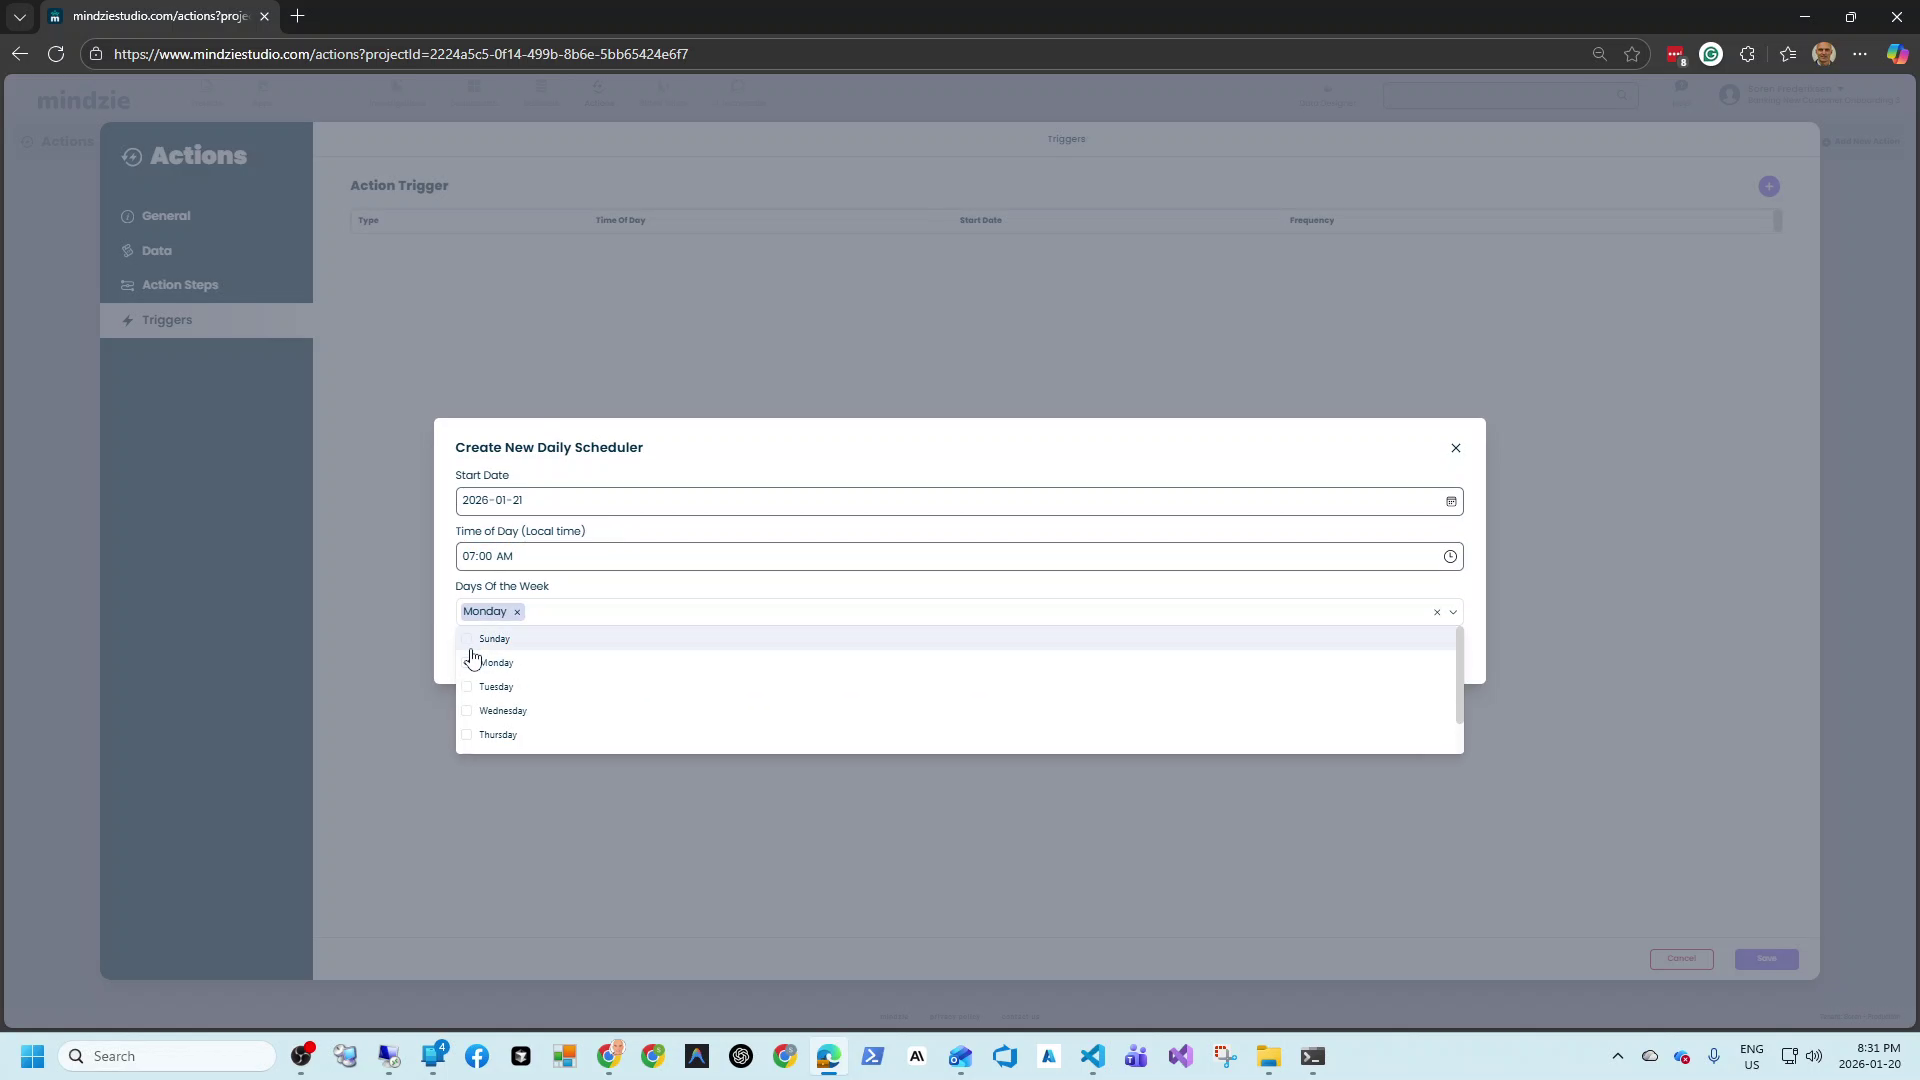
Start Date: The date when the action schedule begins.
Time of Day: The time (in your local timezone) when the action will run.
Days of the Week: Select which days the action should run. For example, select only Monday to run a weekly report every Monday morning.
Common scheduling patterns:
- Weekly reports: Run on Monday at 7:00 AM
- Daily imports: Run every day at 6:00 AM before business hours
- Monthly summaries: Run on the first Monday of each month
Managing Actions
After creating an action, it appears in the Actions list.
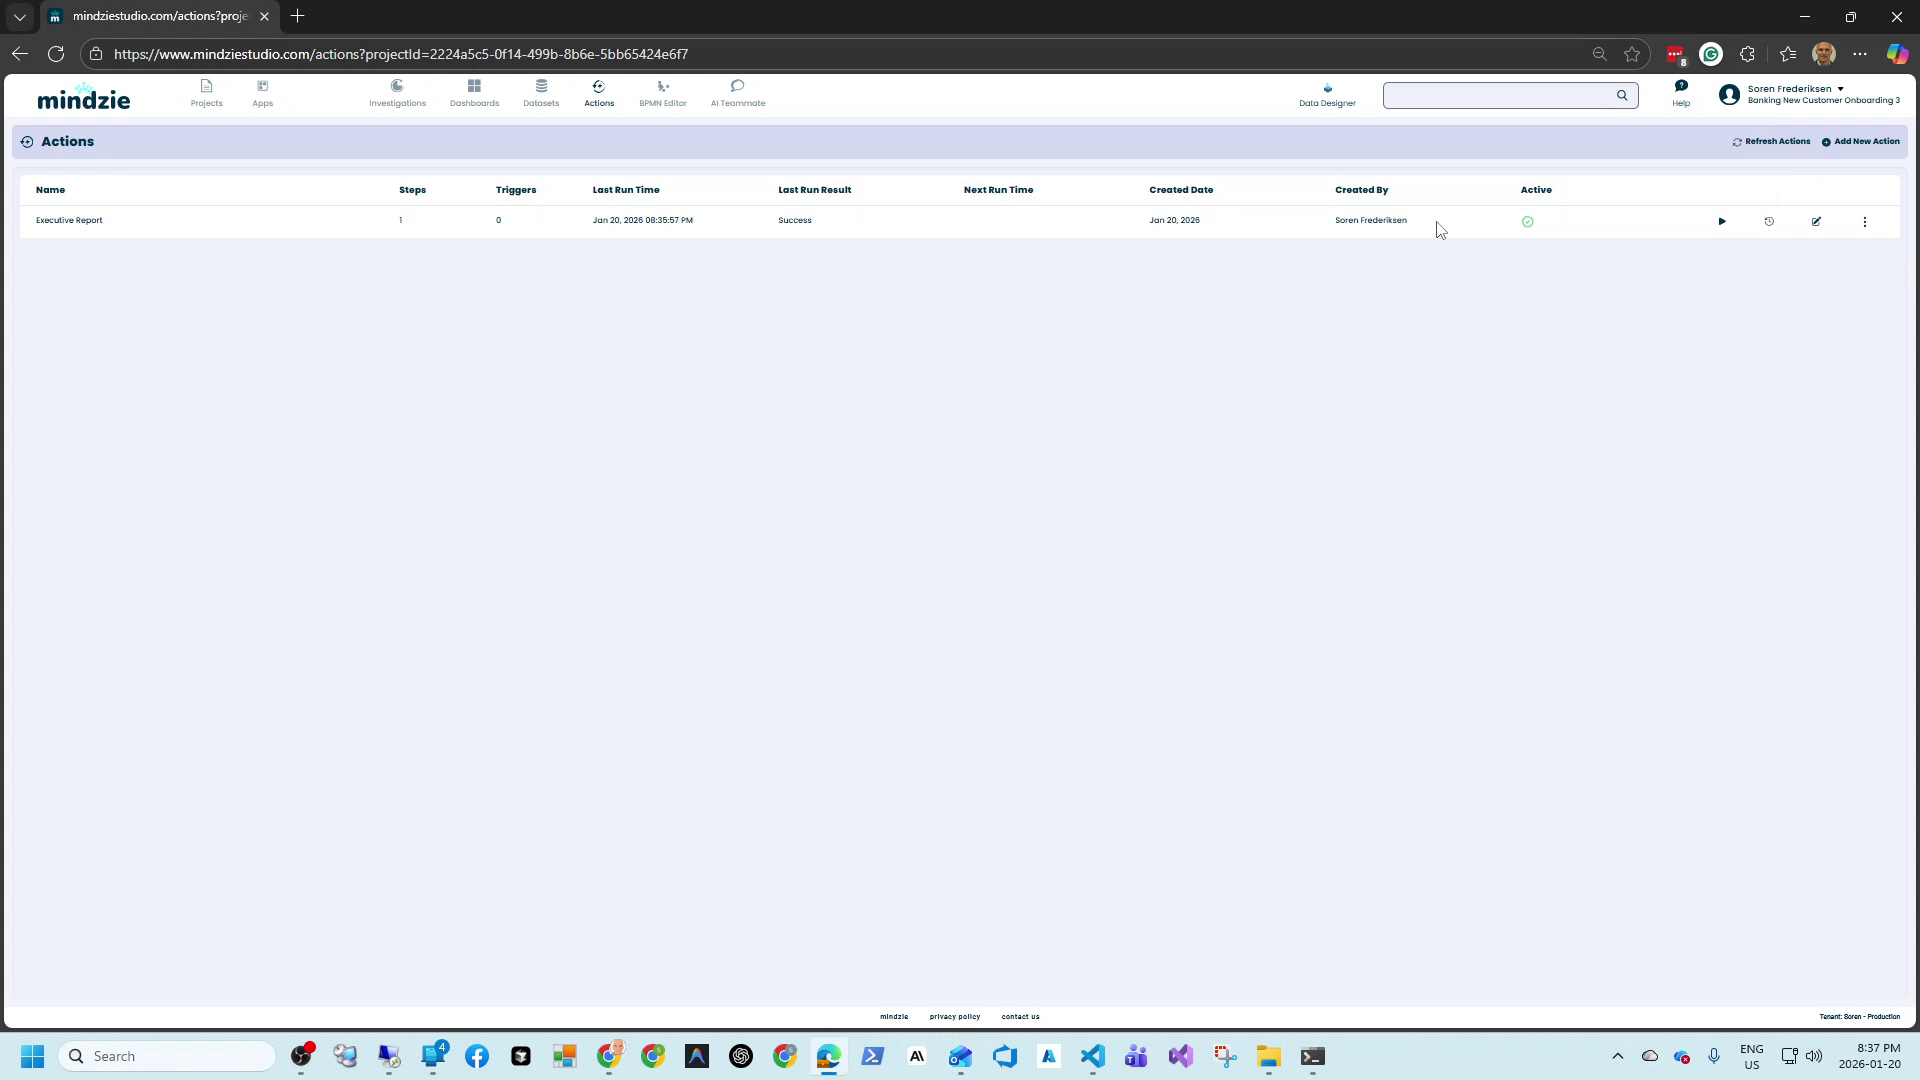
The Actions list shows:
| Column | Description |
|---|---|
| Name | The action name |
| Steps | Number of action steps configured |
| Triggers | Number of triggers configured |
| Last Run Time | When the action last executed |
| Last Run Result | Success or failure status |
| Next Run Time | When the action will run next |
| Created Date | When the action was created |
| Created By | Who created the action |
| Active | Whether the action is enabled |
Action Controls
Each action row has several control buttons:
- Run (play icon): Execute the action immediately for testing
- History (clock icon): View the execution history and results
- Edit (pencil icon): Modify the action configuration
- Menu (three dots): Additional options including Disable and Delete
Running an Action Manually
Click the Run button to execute an action immediately. This is useful for:
- Testing a new action before scheduling it
- Running an action outside its normal schedule
- Verifying changes to an action work correctly
Viewing Action History
Click the History button to see when the action has run and whether each execution succeeded or failed. This helps you:
- Monitor action reliability
- Troubleshoot failed executions
- Verify scheduled actions are running as expected
Disabling an Action
Use the three-dot menu to temporarily disable an action. A disabled action:
- Remains in your action list
- Retains all configuration
- Does not run on schedule
- Can be re-enabled at any time
This is useful when you need to pause an action without deleting it.
Best Practices
Use descriptive names: Name actions clearly so you can identify them later (e.g., "Weekly Executive Report - Monday 7am")
Test before scheduling: Always use the Run button to test new actions before relying on scheduled execution
Monitor execution: Check the Actions list periodically to ensure your actions are running successfully
Schedule strategically: Run data imports before report generation, and schedule reports to arrive when stakeholders need them
Use Error & Warning reports: Set up an Error & Warning Report for project owners to catch issues early
Support
If you encounter issues with Actions:
- Email: support@mindzie.com
- Check the action history for error details
- Verify your analysis data is still valid and accessible